 Troubleshooting
Table of Contents
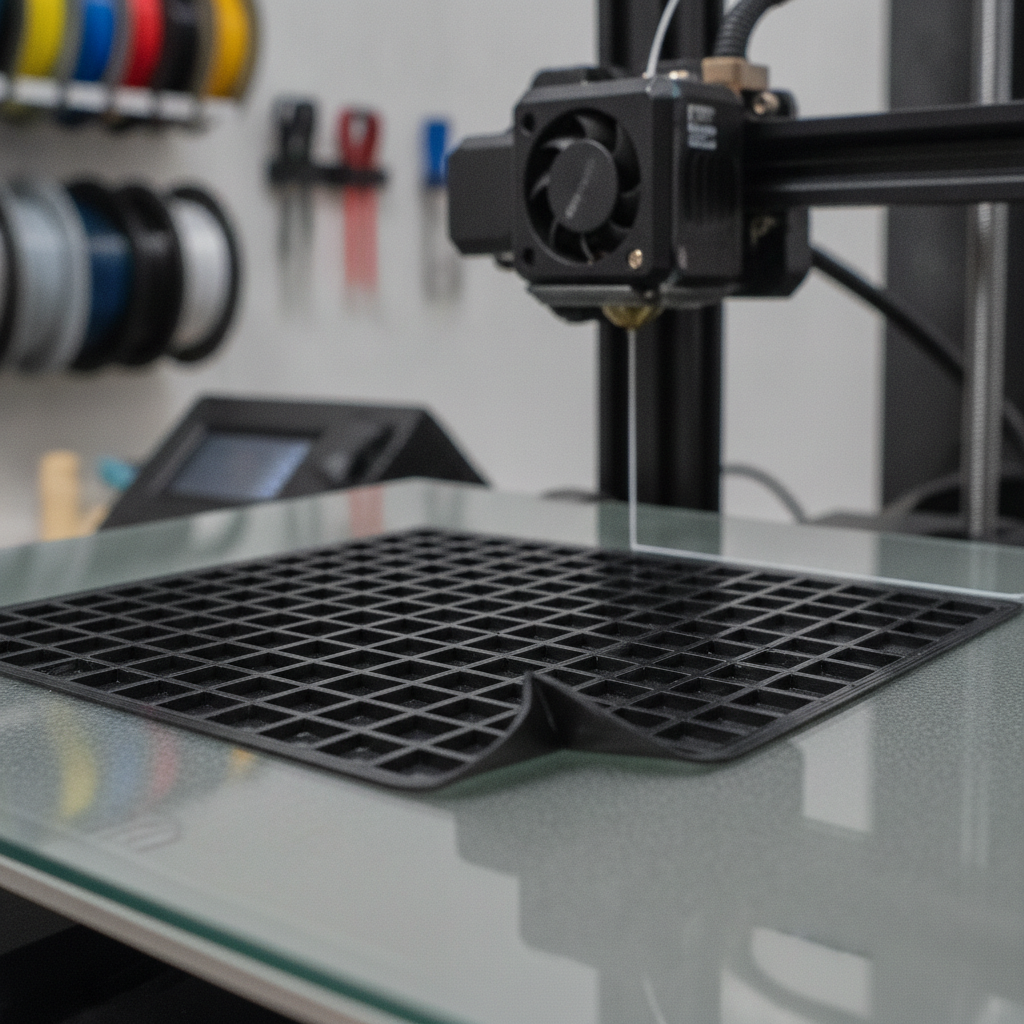
You start a big print, walk away, and come back to find the corners have peeled up off the bed like the tips of a stale slice of bread. Sometimes the whole part detaches and skates around. Sometimes it stays stuck but the base curves and the dimensions are ruined. That curling and lifting is warping, and nine times out of ten it’s ABS being printed without an enclosure.
The frustrating part is that warping isn’t a single setting you can flip. It’s a fight against the way plastic behaves when it cools. Once you understand what’s actually happening, the fixes make a lot more sense.
Why Plastic Warps: The One-Paragraph Version
Hot plastic is bigger than cold plastic. When filament leaves the nozzle it’s molten and expanded, and the second it lands it starts shrinking as it cools. The bottom layers stuck to a heated bed stay warm and stay put, but the layers above cool faster and shrink faster. That uneven shrinkage, called differential cooling, creates internal stress that pulls the part inward and upward. The corners and edges have the least material holding them down, so that’s where the stress wins first and lifts the print off the plate. Everything below is about either slowing that cooling down or anchoring the part hard enough to resist the pull.
It Starts With the Material
Not all filament warps the same, and knowing where yours falls saves you a lot of guessing.
- PLA barely warps. It shrinks very little as it cools, so a clean bed at 55-65C handles almost any PLA print. If your PLA is warping, something else is wrong (a draft, a dirty plate, or a bed that’s too cold).
- PETG sits in the middle. It shrinks more than PLA and needs a hotter bed, usually 70-85C. It’s forgiving on small parts but will lift on big flat ones.
- ABS and ASA are the warping kings. They shrink dramatically as they cool, which is exactly why they need a bed at 100-110C and, honestly, an enclosure. Trying to print a large ABS part on an open frame in a cool room is a losing battle no matter how good your settings are.
If you’re still deciding what to run for a given project, our breakdown of PETG vs PLA and when each wins is worth a read before you fight warping you could’ve avoided.
Fix 1: Get the Bed Temperature Right
The heated bed is your first defense. Keeping the bottom of the print warm slows the shrinkage gradient so the lower layers don’t yank the corners up.
Use these as starting points and adjust up if you still see lifting:
- PLA: 55-65C
- PETG: 70-85C
- ABS / ASA: 100-110C
A common mistake is running ABS on a 90C bed because that’s what the spool label said. Push it to 100C or higher. The bed can’t be too hot for ABS as long as the part still releases when it cools.
One thing worth bumping for any tricky material: set your first-layer bed temp a few degrees hotter than the rest of the print, then drop back after layer one. That extra heat at the start buys you a stronger foundation.
Fix 2: Slow the Cooling (Enclosures and Drafts)
This is the big one for ABS, ASA, and large PETG. If the air around the print is cool, the upper layers cool too fast and the stress spikes. The solution is to keep the ambient temperature around the print high and stable.
- Turn off your part cooling fan for ABS and ASA, or run it very low. PLA wants the fan blasting; ABS wants almost none. Cooling the part fast is the opposite of what these materials need.
- Enclose the printer. A sealed chamber lets heat from the bed and hotend build up, which is exactly why enclosed machines like the Bambu Lab P1S or X1C handle ABS so much better than an open Ender 3. No enclosure? A cardboard box over the printer or even a clear storage tote works for a first try. Just keep it away from the power supply and electronics.
- Kill the drafts. Move the printer away from open windows, doorways, and HVAC vents. A single cool breeze across a big print will lift a corner every time. Never aim a room fan at the machine.
For PLA this matters less, but the same draft rule applies. We covered drafts and ambient air in the first-layer adhesion checklist too, because warping and bad adhesion are often the same problem wearing different clothes.
Fix 3: Anchor the Part With a Brim or Raft
If you can’t stop the shrinkage, you can at least give the print more grip so it can’t pull free.
- Brim: a single-layer skirt of extra material printed flat around the base of your part, fused to it. It massively increases the contact area at the corners where lifting starts. Start with a brim width of 5-8mm. This is the go-to for warping because it’s cheap, fast, and peels off cleanly afterward. For most warping problems, a brim alone solves it.
- Raft: a full multi-layer platform printed underneath the whole part. It’s heavier-duty than a brim and useful for parts with tiny footprints or stubborn ABS, but it wastes filament and can leave a rough bottom surface. Reach for a raft only when a brim isn’t enough.
If you want a step between the two, a draft shield (a thin wall printed around the whole model) traps warm air against the print like a mini enclosure. OrcaSlicer and PrusaSlicer both have it built in.
Honestly, start with a brim. Most people skip straight to rafts and waste plastic on a problem a brim would’ve fixed.
Fix 4: Nail the Bed Adhesion
Even with perfect temps, the print has to actually grip the plate. A part that’s barely holding on has no chance against shrinkage stress.
- Clean the surface. Skin oils kill adhesion. Wipe textured PEI or smooth PEI with 90%+ isopropyl alcohol before printing. Handle textured plates by the edges only.
- Glue stick is your friend for ABS and PETG. A thin, even layer gives extra tack and, on PETG, actually protects the plate from over-bonding and chipping. A plain purple glue stick is all you need.
- Textured PEI grips most materials well on its own for PLA, but ABS still benefits from glue on top.
- First-layer settings matter. Slow the first layer to around 20mm/s, set first-layer height to 0.2mm or higher, and bump line width to 110-120%. More squish and more contact area equals more anchor. The first-layer adhesion checklist walks through dialing these in.
Fix 5: Design and Orientation Tricks
Some warping is baked into the model. Sharp 90-degree corners concentrate stress, which is why they lift first. Adding small “mouse ear” discs at the corners (little flat circles fused to the part) spreads that stress out, and you snip them off after. Rounding sharp external corners in the model itself does the same thing. And if a part has a long flat base, orienting it differently or splitting it can dodge the worst of the stress entirely.
The Quick Triage
When a print warps, check in this order:
- Right bed temp for the material? Bump it up.
- Fan off for ABS, drafts blocked, enclosure if you have one.
- Add a brim, 5-8mm.
- Clean plate plus glue stick for ABS and PETG.
- Slow, squished, hot first layer.
Most warping dies somewhere in the first three steps. The deeper you get into ABS and big flat parts, the more the enclosure becomes non-negotiable rather than optional.
The thing to internalize is that warping is a heat management problem dressed up as an adhesion problem. The day you stop thinking “how do I make it stick harder” and start thinking “how do I keep this part from cooling unevenly,” you’ll fix warping faster and stop chasing the wrong settings. Match the material to the conditions you can actually provide, and pick your battles. If you don’t have an enclosure, just print that big bracket in PETG instead of ABS and save yourself the headache entirely.
Sponsored
Ready to Print?
Browse our guides for more tips on getting the best results from your printer.
Browse All GuidesReady to Print?
Browse our guides for more tips, reviews, and step-by-step tutorials to get the most out of your 3D printer.
Browse All Guides